Once you are ready to add new content to your website, navigate to yourwebsite.com/owner-dashboard (example: sigma1.com/owner-dashboard) and log in with your provided credentials.
Once you are logged in, you will see something similar to the image below (features may vary depending on your website template & purchased plan). We added the red numbers to assist in this documentation process.
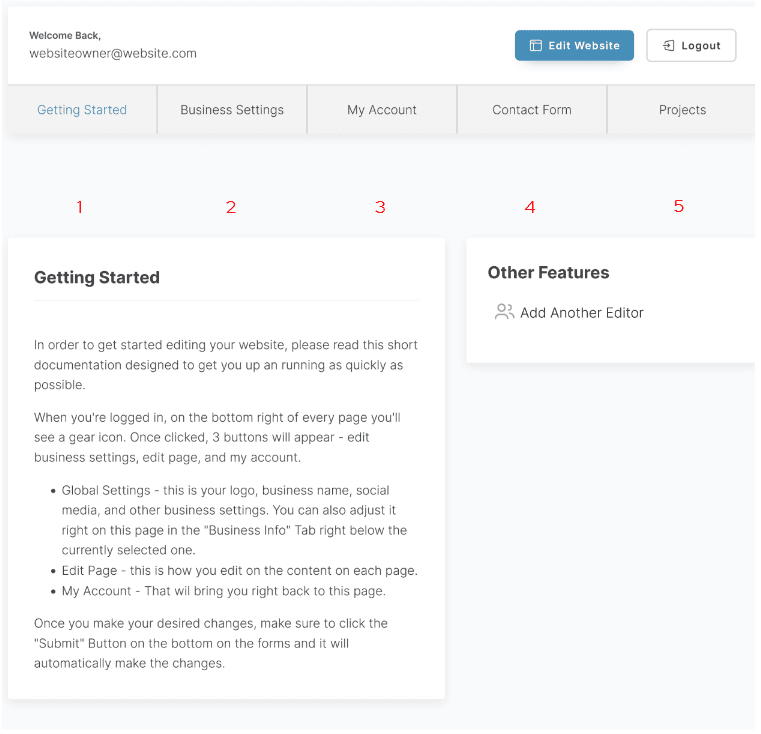
1. The getting started tab is simply there for a quick getting started guide. We will cover all of that in this documentation.
2. Business Settings – The business settings tab is where you manage all aspects of your business. This allows you to change your logo, colors, favicon, phone number, etc...
3. My Account – This is where you can change your username & password
4. Contact Form – This is where all of your contact form submissions appear. If you are not using a contact form, this section will be blank, and you can safely ignore it.
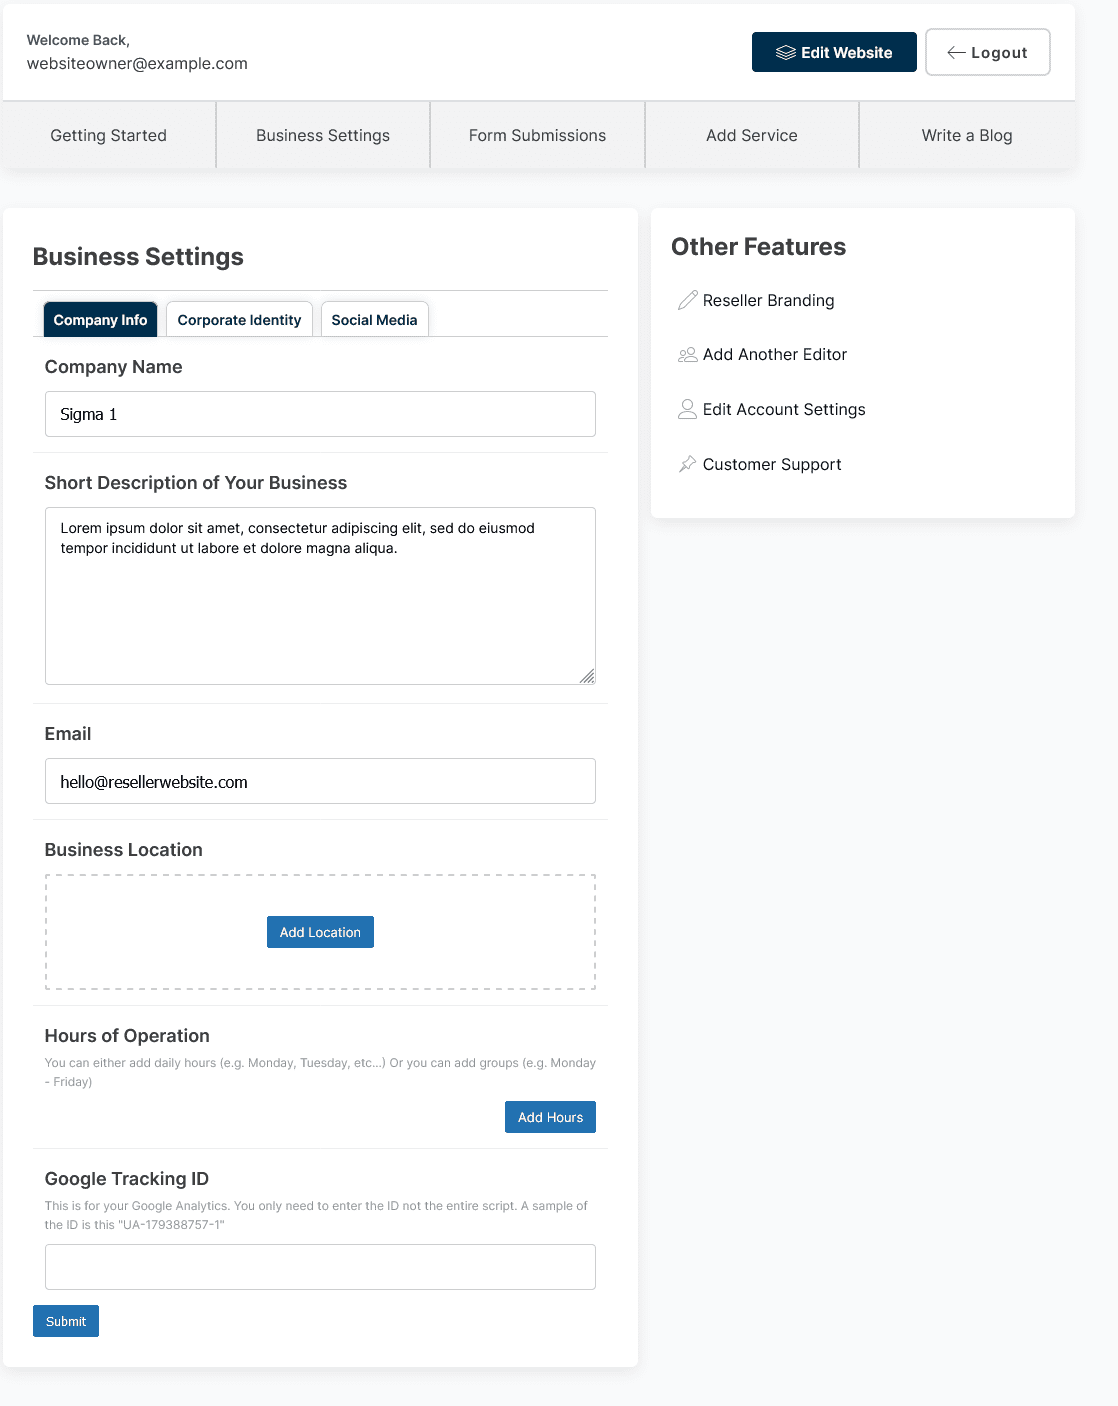
If you click on the tab titled "Business Settings" you will see a new form (see below). We will list out all of the fields below:
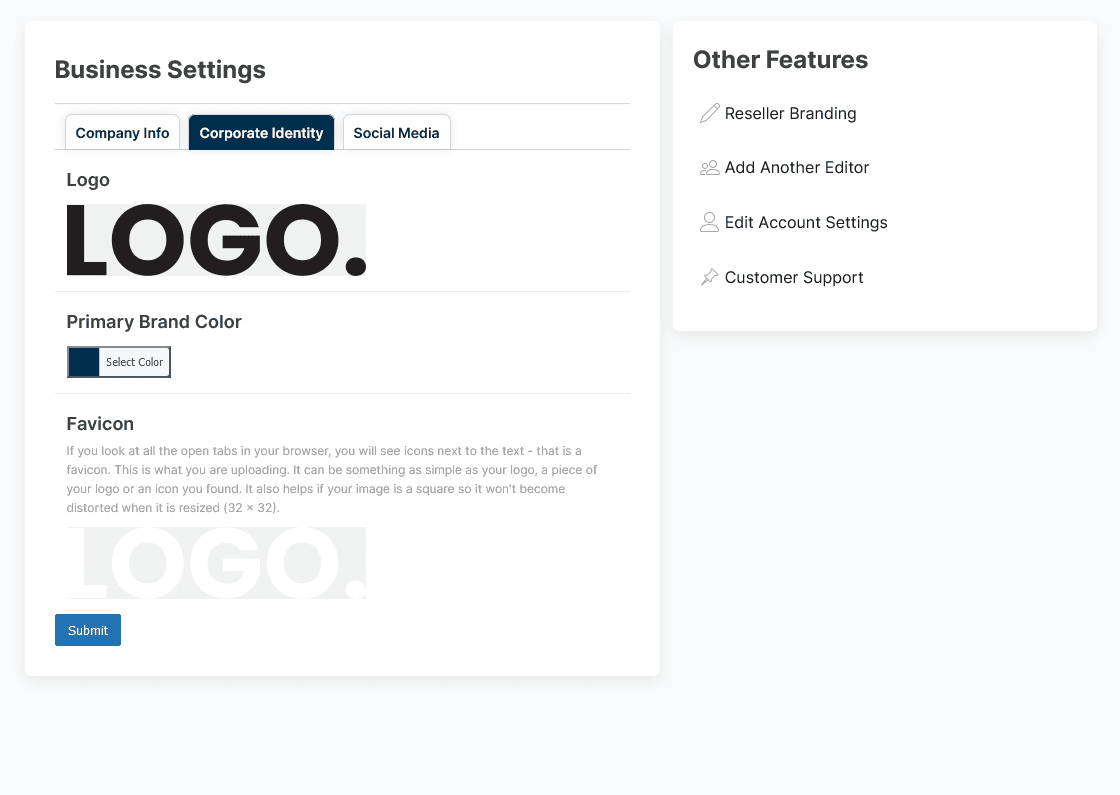
Now if you click on the "Corporate Identity" tab, it will show you a set of new fields (see below).
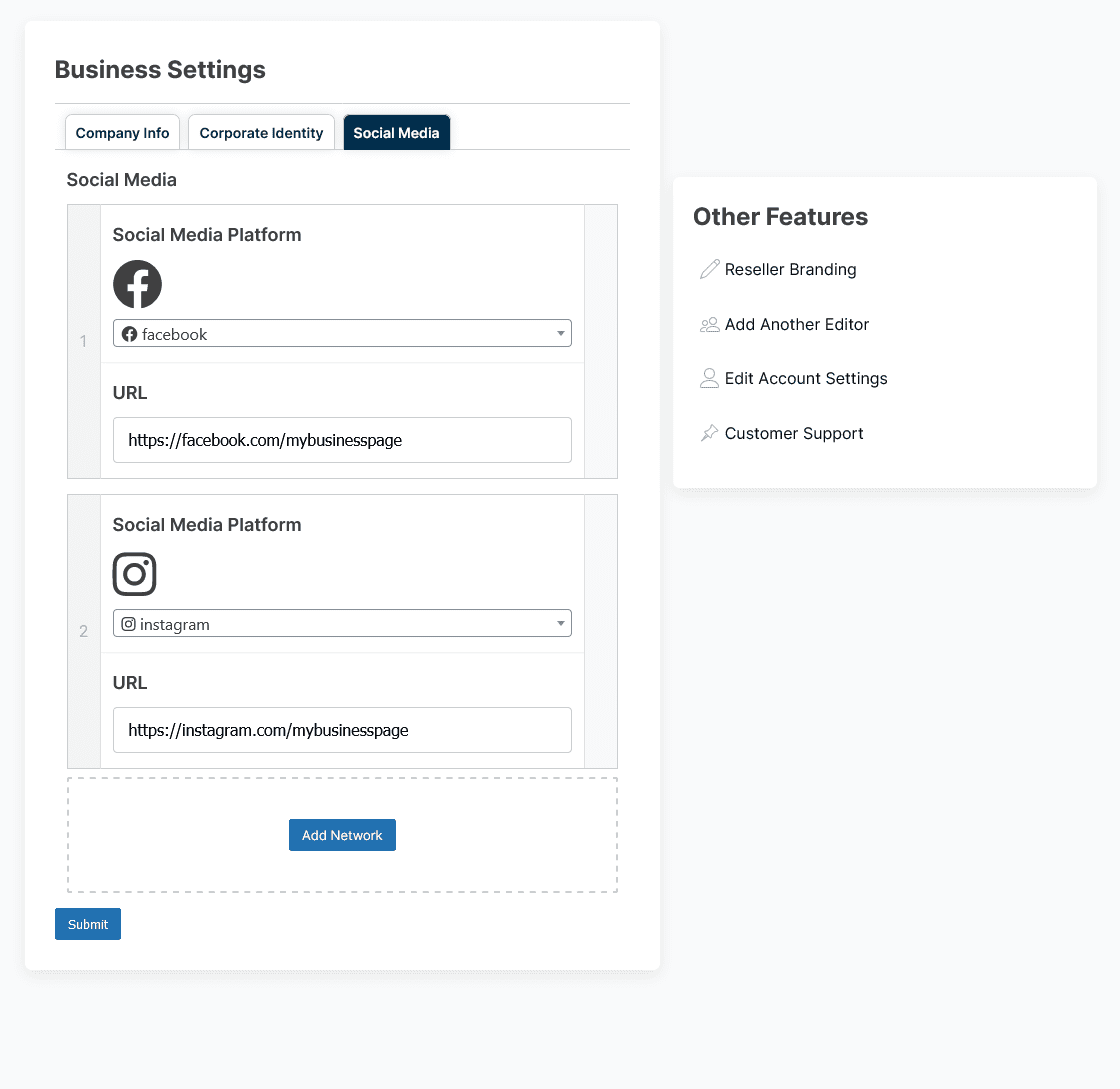
Let's click on the Social Media Tab. You will now see a new set of fields for your social media networks (see below).
In order to add a new social media network, simply click on "Add Network" and select the respective icon. Then you add the proper link and click submit. You can add as many as you want.
Please Note: Our software ensures that you have "https://" or "http://" before your network. If it does not have one of those prefixes, it will not accept your social media networks.