You have probably seen businesses advertising their website on their shopfront, vehicle, promos, etc. using their Gmail, Hotmail, or ISP provider’s email address! Vehicle advertising business domain and Gmail address.
This not only looks unprofessional, but what happens if your free email account gets shut down or the business uses an ISP-supplied email address and needs to switch service providers?
Using custom domain email addresses not only makes your business look professional, but it also allows you to keep your business communications running without disruptions or additional costs if you decide to switch web hosting providers, ISPs, email services, etc.
Using domain email addresses can benefit your business. For example:
Let’s create a simple setup that will let you manage your emails effectively.
For this example, suppose we manage a small business, where:
Our website domain is “MyDomain.com.”
A simple diagram of our business, then, looks like this:
If you are subscribed to our email package we give you email hosting with every website and provide 4 different types of emails for your site at no additional cost:
This tutorial focuses mostly on using Email Accounts and Email Aliases to set up emails for your business. We’ll also touch on using Email Forwarding later.
Before we go any further, let’s make sure that you understand the difference between an email account, an email alias, and email forwarding:
Notes:
So, you have purchased your domain name.
Before we can set up emails for your domain on our platform, we need to configure a few things.
Below is a quick setup guide.
We’ll start with a newly registered domain.
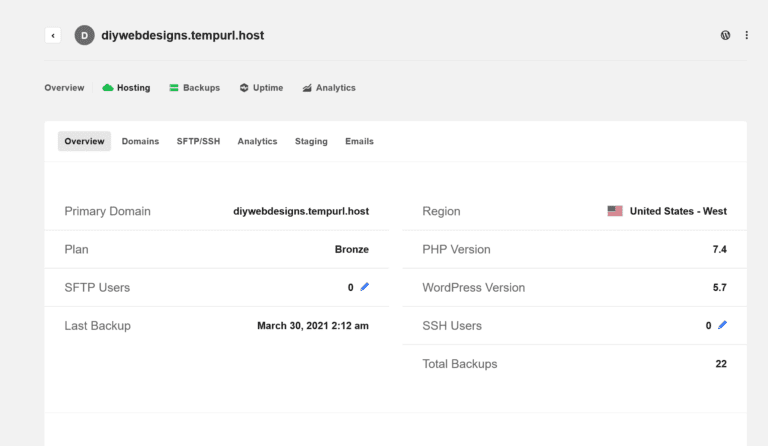
When creating a new account, there are a few steps we need to take to get your website up and running smoothly. Once we have to create your website and provisioned your hosting account. You can log into your hosting dashboard. Now let's add a domain to your account, simply follow these steps:
1. Navigate to the hosting tab (see green cloud)

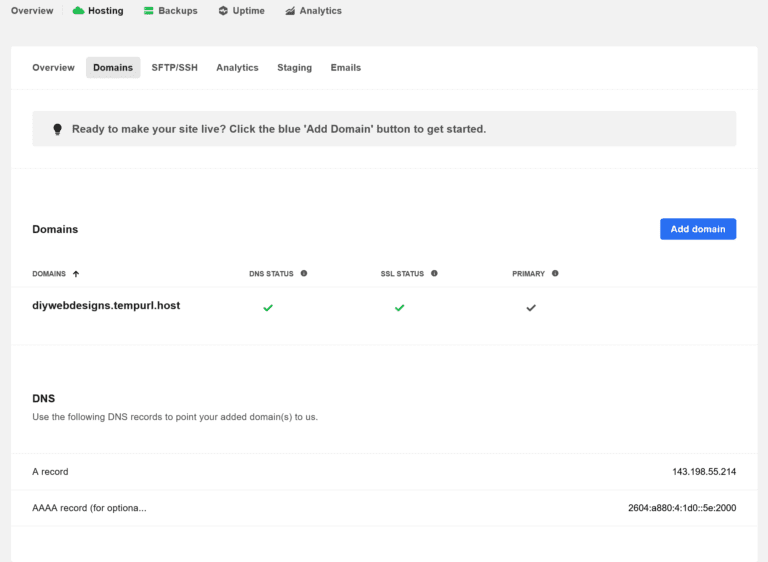
2. Click on the “Domains” tab. Once there click the blue “Add Domain” button. Then copy the A record and add it to your DNS records.

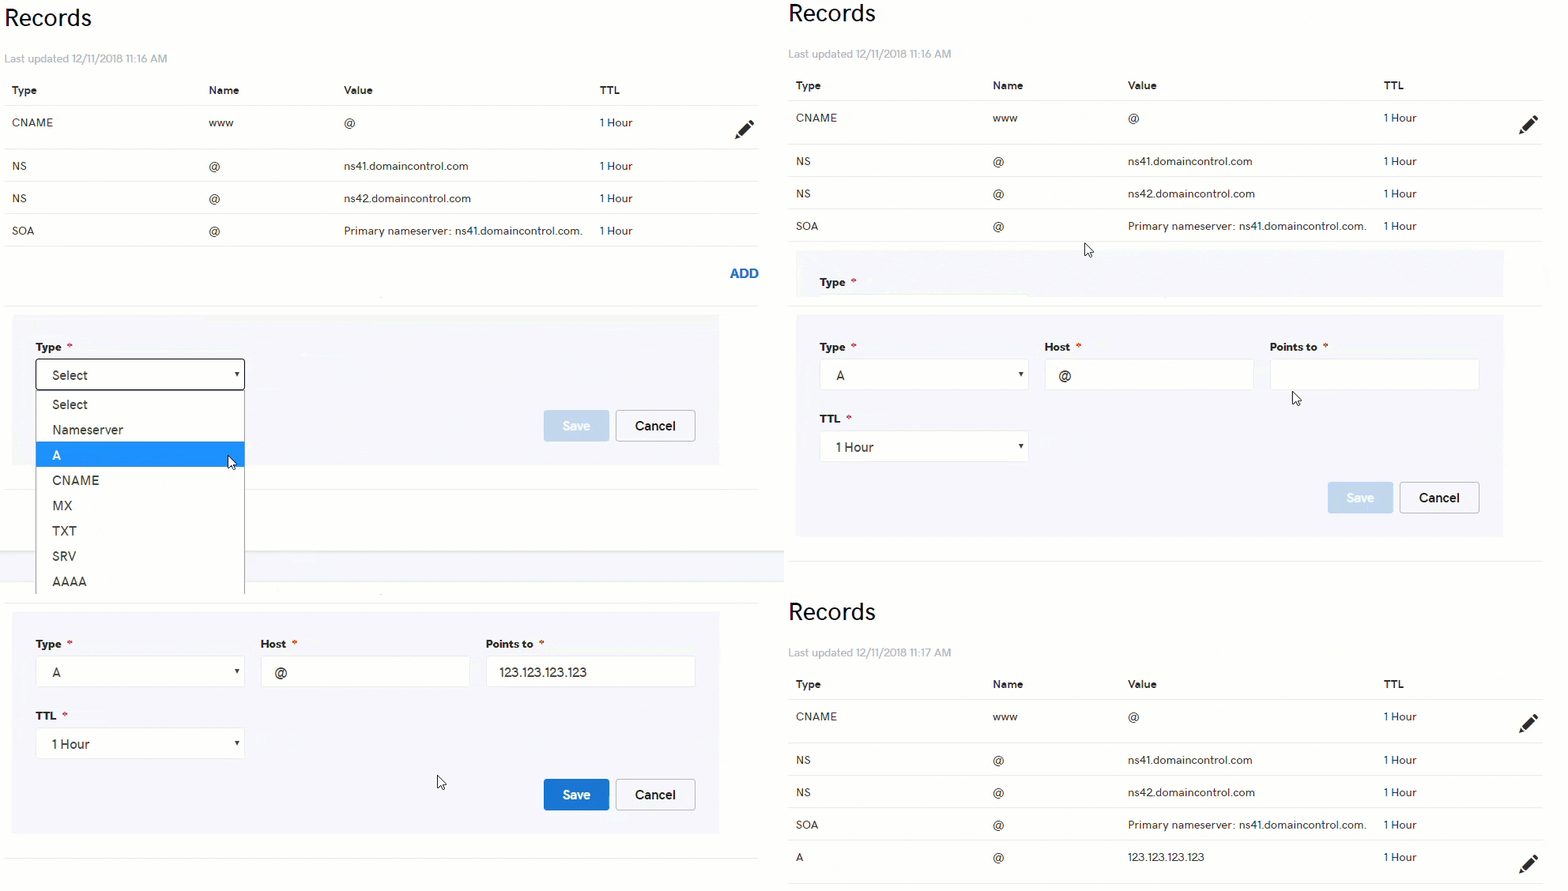
3. Go to your domain registrar, in this example, we are using GoDaddy. Navigate to your DNS settings and follow along with the gif. Instead of 123.123.123.123 for the IP Address add the one you copied in Step 2. Now also repeat this step and instead of adding "@" add "www". So in total, you will create two A Records.

4. Once you set the A Records, it can take up to 48 hours for it to propagate, although it is usually much quicker. Go back to your hosting panel and click on the domain you want to set as your primary.
